Saturday, September 29, 2012

Yummy Honey Chicken Kabobs

My man loves meat! He also loves anything cooked on the barbecue and since I just learned how to use the fiery beast this week, I've been trying to perfect my abilities. So, kabobs it is. These were the best chicken kabobs I've ever had. So juicy!
 
YUMMY HONEY CHICKEN KABOBS:
Serves: 4 people
 
1/4 cup vegetable oil
1/3 cup of honey
1/3 cup of soy sauce
1/4 teaspoon of pepper (I usually add more)
4 chicken breast, cut into 1 inch cubed
2 cloves of garlic
1 large sweet white onion, cut into 2 inch pieces
1 red bell pepper, cut into 2 inch pieces
1/2 cup of assorted cherry tomatoes (I used red, golden and black from the garden)


In a large bowl, whisk together oil, honey, soy sauce, and pepper. Before adding chicken, reserve a small amount of marinade to brush onto kabobs while cooking (I forgot to do this and they were still awesome, flavorful and juicy). Place the chicken, garlic, onions and peppers in the bowl or plastic bag if you don't enjoy dishes, and marinate in the refrigerator at least 2 hours (the longer the better).

 
Preheat the grill for high heat.
 
Drain marinade from the chicken and vegetables, and discard marinade. Thread chicken and vegetables alternately onto the skewers. If you are using wood skewers soak them in water first so that they won't burn on the barbecue.


Lightly oil the grill grate. Place the skewers on the grill. Cook for 12 to 15 minutes, until chicken juices run clear. Turn and brush with reserved marinade frequently.


Check out the original recipe HERE, without alterations.

Thursday, September 27, 2012

Dresser Turned Buffet (Complete!)

In a previous post I had been working on an old dresser from my grandmother, which had been passed down or purchased by her to my father and then to my brother. It was on it's way to be sold at a garage sale when I caught a glimpse of it and nabbed it. These are the GRAND FINALE pictures of the finished project. It took a few weeks, but it is finally complete and I'm one happy momma about the outcome :)


If you have a hankering to see the before pictures or would like to see how I did this click HERE!

Wednesday, September 26, 2012

BLUE CHEESE STEAK SANDWICHES

BLUE CHEESE (LEFTOVER) STEAK SANDWICHES:
Servings: 2 People

ciabatta bread
1-2 leftover steaks (sliced)
spinach (can also use arugula)
olive oil
1 red bell pepper
1/4 sweet white onion
blue cheese
mayonnaise
pepper & salt

Heat up the BBQ. Make sure it's not searing hot because you don't want charcoal sandwiches.

Cut onion 1/4 inch thick slices. Cut bell pepper into 1/4 inch strips. Put onion and bell pepper in a bowl. Drizzle about 2 tablespoons of olive oil. Sprinkle with pepper and salt. Then, toss.
 
 
Grill onions and bell peppers, with lid on. Grill for approximately 5 minutes on each side, or until LIGHTLY charred and tender.
 
 
Cut Ciabatta bread ( I used one from Target and it was fabulous). Brush each surface with olive oil. Grill with cut side down for 1-2 minutes or until crispy (keep and eye on these suckers, they can blacken fast)


Spread Blue Cheese on the bottom of the cut sides. Then top with baby spinach, bell peppers, steak and onion. Spread mayo on the top half and press lightly press to the bottom half on op of onion. Then, ENJOY!!


These were fabulous! My husband LOVED them! If you got a hungry meat eating man at home. Cook a nice steak dinner one night and follow up the next with this recipe. It's sure not to disappoint. To see the original recipe, go HERE!


Tuesday, September 25, 2012

BABY BOOT CAMP

I can't get enough of this girl. Juliet and I went to visit Gma & Gpa this weekend while Daddy worked some overtime. These three were having way to much fun together :)

 
Due to my limited video editing abilities this one is sideways. Bahhh. Where is my brother when I need him?
I hope you enjoy it as much as I do even if it puts a kink in your neck.

Monday, September 24, 2012

ASIAN ORANGE CHICKEN

My husband and I love orange chicken, but hadn't found a recipe that really struck our fancy until we found this one. I made a few alterations because the original version is a little too sweet and needed more kick! It's simple enough and makes for one great delish dish!

ASIAN ORANGE CHICKEN
Serving Size: 4

1 1/2 cup water
2 tablespoons orange juice
1/4 cup lemon juice
1/3 cup rice vinegar

2 1/2 tablespoons soy sauce
1 tablespoon grated orange zest
3/4 cup packed brown sugar (can be less)
1/2 teaspoon minced fresh ginger root
1/2 teaspoon minced garlic
1/2 teaspoon red pepper flakes
3 tablespoons cornstarch
2 tablespoons water
 
2 boneless, skinless chicken breasts, cut into 1/2 inch pieces
1 cupall-purpose flour
1/4 teaspoon of salt & pepper
3 tablespoonsolive oil
 
Pour 1 1/2 cups water, orange juice, lemon juice, rice vinegar, and soy sauce into a saucepan and set over medium-high heat. Stir in the orange zest, brown sugar, ginger, garlic, chopped onion, and red pepper flakes. Bring to a boil. Remove from heat, and cool 10 to 15 minutes.
 
 
Place the chicken pieces into a resealable plastic bag. When contents of saucepan have cooled, pour 1 cup of sauce into bag. Reserve the remaining sauce. Seal the bag, and refrigerate at least 2 hours.
 
 
In another resealable plastic bag, mix the flour, salt, and pepper. Add the marinated chicken pieces, seal the bag, and shake to coat.
 
 
Heat the olive oil in a large skillet over medium heat. Place chicken into the skillet, and brown on both sides. Drain on a plate lined with paper towels, and cover with aluminum foil.
 
 
Wipe out the skillet, and add the sauce. Bring to a boil over medium-high heat. Mix together the cornstarch and 2 tablespoons water (can combine the two in a small jar and shake); stir into the sauce. Reduce heat to medium low, add the chicken pieces, and simmer, about 5 minutes, stirring occasionally.


I served this dish with some sliced oranges, broccoli and white rice. It was a hit and we even had leftovers. For the original recipe (without my alterations) go to allrecipes.
 
LOVE THAT SHIRTLESS MAN!


Friday, September 21, 2012

MORNING SCONES

I met Jen in college. She was crazy. Not the crazy crazy, but the good kind of crazy. She smiled a lot, had a great sense of humor and always knew how to have fun even during medial tasks. She's a rare breed of female.

We didn't hit it off initially. I thought she was introverted and had mostly male friends. And she thought I was, to put it frankly "a bitch". I can't even remember the first place we met each other, but wherever, or whenever it was we hit it off.

We've been friends for 8 years now. We're both married married to Jon's and we both have baby girls.
 

For my wedding Jen made me a recipe book out of a leather bound photo book. She wove pictures of us throughout the years in it. Some from college, special trips and even one from her wedding. I cherish this gift. This is one of my favorite recipes from her collection, now gifted to me.
 
MORNING SCONES:
 
3 cups flour
1/2 sugar
5 tsp baking powder
1/2 tsp salt
3/4 cups butter
1 egg, beaten
1 cup milk
 
 
Combine all dry ingredients in a large bowl. Cut in butter with a pastry tool. Beat egg in a measuring cup and fill to 1 cup with milk, mix together.
 
 
Stir wet ingredients into dry. turn dough on lightly floured surface. Cut into two sections. Make each sections into 1/2 inch thick rounds. cut into wedges.
 
 
Try adding this combinations to the mixture:
orange zest & cranberries
lemon & blueberries
chocolate chips
Raspberries & white chocolate*


Cook at 400F for 12- 14 minutes or until lightly browned.
*My favorite :)

Thursday, September 20, 2012

BEEF & BISCUITS

I have nothing in the fridge or in the cupboards. When I say nothing I mean the Americanized sense of the word. I have a can of something here, half an onion there, crackers...stuff when blended together doesn't usually make a meal. But, Eureka!

I found a recipe on Southern Food and had to alter it due to the lack of resources.

BEEF & BISCUITS
 
1 pound lean ground beef
1/2 medium onion, chopped
1 small can mild green chilies (4 ounces)
2 teaspoons chili powder
1/2 teaspoon ground cumin
1/2 teaspoon garlic powder
1 cup of assorted tomatoes chopped
1 can of 10 refrigerated biscuits
1 1/2 cup shredded sharp cheddar cheese
1/2 cup sour cream
1 egg, lightly beaten
 
In a large skillet, brown ground beef with onion; drain. Add chilies, chili powder, cumin, garlic powder, salt, and tomato sauce. Simmer while preparing biscuit crust.
 
Separate biscuits, then separate each biscuit into 2 layers. Press 10 biscuit layers over the bottom of an ungreased 9-inch square baking dish. Combine 1/2 cup cheese, sour cream and egg. Remove meat mixture from heat then stir in sour ream mixture. Spoon mixture over biscuit dough. Arrange remaining 10 biscuit layers over the top of the meat mixture then sprinkle with 1 cup of shredded cheese.
 
Bake at 375° for 25 to 30 minutes, or until biscuits are nicely browned.
Serves 4.
 
Overall, the meal was pretty good. It was a little greasier than the usual meals I make, but, for a mom who is on the go this would be a good, filling, fast meal that can be pre-made and then popped in the oven when you get home. You could even make meatloaf or hamburger patties while you're at it for another night.

Wednesday, September 19, 2012

PESTO STUFFED PORK CHOPS

PESTO STUFFED PORK CHOPS

4 pork chops
5 tablespoons of Extra Virgin Olive Oil
2 tsp Basil (I use the kind in the can because it last longer)
1 clove Garlic (chopped)
2 Tablespoon Pecorno Romano cheese (heaping)
3 Tablespoons of Feta cheese
Kosher salt and pepper to taste

1 Teaspoon of pepper
1/2 Pepper flakes
2 Tablespoon of Balsamic Vinegar
1 Teaspoon dried Oregano
1/4 Teaspoon ground Thyme
1 Clove Garlic (chopped)

Preheat oven to 375F

Mix together oil, basil, garlic, cheese, pepper and salt until smooth (Some may want to use a food processor or blender) The first time I tried this recipe I added two slices of herb bread to the mixture, which caused them to be too dry. Leave the bread on the side.


Cut pork while half frozen (So much easier this way). Split mixture into 4 even portion and stuff into pork chops. The place in a shallow baking pan.
 
Mix remaining ingredients in a small bowl and use as a rub on both sides of the pork chops.
 
 
Bake chops until the centers are hot. This took about 40 minutes. Remove from over and brush with 2 tablespoons of balsamic vinegar and then return to oven for an additional 5 minutes. Serve and enjoy.


*I served mine with broccoli which was a nice complimenting flavor.
 
Fab reviews at allrecipes !

Friday, September 14, 2012

MOLTEN LAVA GOODNESS

In play group last week I overheard some of the women talking about a fantastic Molten Lava Cake recipe. My palatee watered. The conversation turned and I forgot to ask for the recipe. Sitting at home I scanned through multiple recipes online and settled on one by Paula Deen. This girl does it right. Nothing low fat. Just good ol' cream cheese, cottage thigh goodness. Check it out!

Molten Lava Cake 

6 (1-ounce) squares bittersweet chocolate

 2 (1-ounce) squares semisweet chocolate squares

10 tablespoons (1 1/4 stick) butter
 
 
1 1/2 cups confectioners' sugar
 
3 large eggs
 
 3 egg yolks
 
 1 teaspoon vanilla extract
 
2 tablespoons orange liqueur
Preheat oven to 425 degrees F.
Grease 6 (6-ounce) custard cups. Melt the chocolates and butter in the microwave, or in a double boiler. Add the flour and sugar to chocolate mixture. Stir in the eggs and yolks until smooth. Stir in the vanilla and orange liqueur. Divide the batter evenly among the custard cups. Place in the oven and bake for 14 minutes. The edges should be firm but the center will be runny. Run a knife around the edges to loosen and invert onto dessert plates.

These were so EASY! I was able to do them while Juleit say in her Boppy and watched. Add a little fruit on top for some added sweatness or tartness. I would of liked to try raspberries (my fav) or peaches (Jon's fav).

Thursday, September 13, 2012

Pondering from the Porcelain

I had an epiphany. Sitting on the toilet. Yes, I know this is graphic but that's where bright ideas come...there and the shower. Anyways, I was sitting on the toilet doing my thing, thinking about Miss Juliet's earlier diaper catastrophe when it hit me that all that I am is all thanks to my mother (and some dad of course).  Hang with me here. My ability to talk, walk and use the toilet are all thanks to the patient and helpful instruction of my mother. All of it. I suddenly had a greater appreciation for my mom. You know those moments you wished you would have realized sooner and thinking back to the unappreciative teen years you began to feel really bad, that's me there.

I just wanted to say thanks mom! To all mom's for that matter. You are appreciated and loved. I think Meg Meeker says it perfectly in her book "The 10 Habits of Happy Mothers". She states,

      " The truth is, you are worth more than you can imagine. I don't care if you you
feel like a lousy mom or you are fabulous. Whether you're a workaholic who feels like 
she never sees her kids or a stay-at-home mom who feels unappreciated, you are woefully
 misguided in your thinking...you are not a failure. But you feel like one. I can confidently
 say this because, as a pediatrician, my job is to watch you and keep your kids healthy.
 And when I see them, I see kids who love their moms. I see how your kids look at you,
 hang on to your knees, and hold your hand. I see you more akin to how they see you- as
 a woman who is needed, loved and cherished."
 
Motherhood is no easy job. I'm realizing that now. The tables have turned full circle and I am realizing the sacrifices my mom made. The dreams she had to put on hold, the parties she missed breast feeding in the back room, the outfits she burned after a diaper spillage, the frumpy mom look after those rough 3 night feedings and seeing people you haven't seen for a while in the store ("Really, I don't look like this, it's been a rough night" "Really sister, I couldn't tell by side pony and your boob still hanging out of your shirt"), answering the door and realizing you haven't pulled your shirt down or your not wearing pants (I cannot name the amount of times of done this one), forgetting to eat until 2pm, never enjoying a shower so much in my life (It's the one place that's quite and that I can be free of crotch and boob pads and the stench of milk). Side note, Husbands if you can give your wife anything in the day. Take the baby and allow her to take a long shower. It'll make her feel human again.
 
All this to say thank you mom's. You are needed! You are loved! You are appreciated! Your sacrifices do not go unnoticed...sometimes it just takes your kids 26 years and a baby of their own to get the picture. Love you mom!


My mom Lacy with her first grandchild, my daughter Juliet

Wednesday, September 12, 2012

So, I've started a project..

I've been working on this project for....mmm...three weeks! It's friggin' ridiculous, but when you have a three month old there needs to be some grace in the equation. My goal is to finish it by this weekend. Somewhat for selfish reasons. I'm having a PJ PARTY with my girlfriends and babies on Saturday while my hubby is bear hunting. I would like to have it finished and showcased in the dining room.

The project is simple enough...if I didn't have an infant. My grandmother found this in a magazine and shared it with me and now I am going to share it with you :)


Find a dresser...preferably and cheap (I'm speaking price not quality) dresser from a garage sale or layng around the house (that's what I did). Disregard the B.C. T.V.

Sand all the surfaces. This is really fun when you don't have an electric one and when there are grooves everywhere...grrrr.


Buy these products. I went to Lowe's to purchase these items because my local Home Depot said they no longer carry paintable wall paper. So, heads up.


Cut (I used a box cutter, ruler and pencil) you wallpaper to the dimensions of where you would like it on your dresser. Then use the glue (you can buy the kind I did or get the kind that sprays) and put it on the surface of the dresser and the back of the wallpaper. Wait 5 seconds before adhering together. Let dry.


Then paint. Return to see my finished product at the end of the week. I'm sure I'm just as stocked as you are to see the results!!!!

Tuesday, September 11, 2012

Hush little baby...

Lil' Miss Juliet took her first nap in her big girl bed. It was a struggle at first. I tried to lay her down and she screamed for 15 minutes. So, I laid her down in her bassinet and she quickly fell asleep, then I quietly picked her up and put her in the big bed. We're slowly trying to make the transition starting with a nap or so a week, once a day, most naps and then nights in the bed.

 
This also made me think of a song Juliet and I sing together called "Hush Little Baby". Only the following lyrics were designed by Sylvia Long who thought the old version showed a mother comforting her child with material possessions and decided to make a new twist on an old song. I much prefer Sylvia's version...


Hush Little Baby
Sylvia Long

Hush little baby, don't say a word.
Momma's going to show you a hummingbird.

If that hummingbird should fly,
Momma's going to show you the evening sky.

When the nighttime shadows fall,
Momma's going to hear the crickets call.

When their songs drift from afar,
Momma's going to show you a shooting star.

When that star has dropped from view,
Momma's going to read a book with you.

When that story has been read,
Momma's going to bring your warm bed spread.

If that quilt begins to wear,
Momma's going to bring you your teddy bear.

If that teddy bear won't hug,
Momma's going to catch you a lightning bug.

If that lightning bug won't glow,
Momma's going to play on her old banjo.

If that banjo is out of tune,
Momma's going to show you the harvest moon.

As that moon drifts through the sky,
Momma's going to sing you a lullaby.
 
This is definitely one of our favorite books/songs. It's good one to add to any collection.

Monday, September 10, 2012

WHITE CHICKEN ENCHILADAS

My husband's grandma is a phenomenal cook. Nothing is fat free! So if you're on a diet, run fast, and don't look back. Her late husband Nolan was always so appreciative of her labor's in the kitchen. After the first bite of each meal he would comment "barley edible". Note my sarcasm. He was a grouchy son-of-a-gun.

This is a close second to one of my favorite dishes she makes...

WHITE CHICKEN ENCHILADAS


12 flour tortillas (or 8 if you want large ones)

8 ounces cream cheese
1 teaspoon ground cumin
4  chicken breast
2 cloves of garlic
drizzle of olive oil
 1 can cream of chicken and mushroom soup
1 can of green chilies
1 cup (8 ounces) sour cream
1/2 cup milk
2 jalapeno peppers, seeded and chopped 
1 cup pepper jack cheese
 1/2 cup shredded mozzarella cheese
Few tablespoons of chopped almonds (toast in the oven)
Chipotle Tabasco Sauce (or another fav)
 
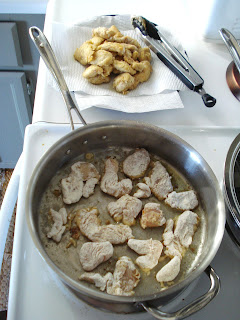
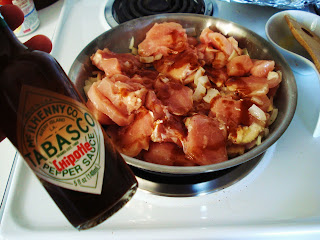
Put 1 tbsp of olive oil in pan. Saute 2 gloves of garlic for 30 seconds, add onion and cook until soft. Add cubed chicken. Next, add a generous amount of chipotle Tabasco sauce. Cook until chicken is cooked through.


Wrap tortillas in platic bag or frezzer bag (leave open). Microwave for 1 minute or until softened. They will be hot!! Meanwhile, in a large bowl, combine the cream cheese and cumin until smooth. Stir in chicken and add green chilies.
 
 
In another bowl, combine the soup, sour cream, jalapenos and milk. Stir 2 tablespoons soup mixture into chicken mixture. Place 1/3 cup of chicken mixture down the center of each tortilla; roll up. Place seam side down in a 13-in. x 9-in. baking dish coated with cooking spray. Top with remaining soup mixture. Cover and bake at 350° for 30 minutes or until heated through. Uncover; sprinkle with cheeses and then with roasted almonds. Bake 5 minutes longer or until cheese is melted. Yield: 6 servings.


In the case you are on a diet. Feel free to substitute cream cheese, soup, sour cream and cheese for low-fat. Try it and love it! I'd love to hear your feedback!


Friday, September 7, 2012

Someone appreciates...

I woke up a few mornings back to find a few friends in the front yard. We have a family of turkeys that have been exploring the neighborhood. There are 10 babies and 3 mommas.

Our home was a previous foreclosure and the grass (what grass?) is dead. We look like the Mohave Desert at the end of the street. So, it was nice to find these little guys there one morning enjoying all the bugs and dry weeds :)


Thursday, September 6, 2012

MUSH STUFF

My father started living on his own at the young age of 14. His parents were divorced when he was 3 and after a particularly nasty custody battle he had had enough. He settled in an old ranch house his grandmother had. Dad had a hardy diet of Corn Flakes for breakfast...lunch...and for dinner. It's no wonder he got mononucleosis. So grandma Viola took it upon herself to make this young man a recipe book and also to buy him an ol' cast iron dutch oven (which I believe is the same one he still uses today). This is a twist on an old recipe he used to make for us kids out of that dutch oven.

Let's just say it's definitely a step up from Corn Flakes.

MUSH STUFF
6 eggs
3-4 sliced of bread cubed ( I like to use old baguettes)
1/4 red onion chopped (sauteed in bacon or sausage grease for a few seconds)
5-6 slices of bacon chopped or sausage or BOTH :)
few ounces of cubed or grated cheese (mozzarella, cheddar or pepper jack)
Pepper to taste
* I don't like to add salt because the meat adds enough.
 
 
Let all items sit and bowl for a few minutes. This allows the bread to soak up all the flavored goodness.
 
If you're using a dutch oven, toss ingredients in, put on medium heat an let sit with the lid on. It should only take 15 minutes or so. Test with a fork to make sure cooked.
 
 
If you're like me and have no dutch oven and a hungry husband who wakes up before the sun comes up use a cupcake tin. In the morning it makes for a nice little snack that can be popped in the microwave and WHAM-BAM you have one happy papa bear.


Cook in Oven at 350F for 20 minutes or until tops are brown.